Showing posts with label CRM Integration. Show all posts

Wednesday, May 5, 2010

Priority Mode - Perfect for Fast Follow-Up


Eloqua's Spring release had many interesting new capabilities in it, but among the most powerful is a new "mode" for processing your marketing automation programs that process leads from inbound forms that need to be followed up quickly.

Typical marketing automation programs in Eloqua use "Standard Mode" for processing. This mode means that every 15 minute cycle, each step in the program is processed, emails are sent, data is manipulated, contacts are updated, and then moved to the next step.

This works very well for situations where you are using a marketing automation program to send outbound campaigns, observe online behaviour, and then send another campaign a few days or weeks later. The time increment of 15 minutes per cycle presents no problem at all in this scenario.

However, for inbound leads, who have just submitted a web form, this is not the case. You often want to score them, cleanse and normalize data on them, and then route them to sales for follow-up very quickly. With each step adding time before the lead got to sales, this was a challenge.

Now, Priority Mode solves that problem. Marketing automation programs that are enabled in Priority Mode will run every contact in the program (up to 100 at a time) all the way through the program every time they run, and they will run every 5 minutes.


To enable a program to run in Priority Mode, simply select that as the mode you wish to run it in when you click "Enable Program" and are presented with the choice.

If you have existing programs that take hot leads from your web forms and pass them to sales, you may wish to revisit them and have them run in Priority Mode if it makes sense.

Note that only 100 contacts at at time will run through the program. If there are more than 100 contacts in the program, the remainder will be left for the next 5 minute increment. As this mode is mainly useful for quickly getting leads out to sales from web forms, this is usually more than sufficient (as most sales teams cannot process more than 100 leads every 5 minutes).

I look forward to hearing from you as you experiment with Priority Mode for your programs.

Monday, May 3, 2010

Company Level Lead Scoring - from 4Thought Marketing


Guest post from 4Thought Marketing's Mark LeVell. 4Thought Marketing has been a great "Expert in the field", having worked with Eloqua over a long period of time, and having developed Partner Relationship Management (PRM) and Facebook extensions for Eloqua, among other innovations.

In this post, Mark looks at the challenges and opportunities of company-level lead scoring.

========================================

For many B2B companies, traditional Lead Scoring programs have a weakness in that they typically score on an individual (contact) basis, or sometimes a summed individual basis, but often fail to consider the broader and more complex corporate digital body language that can signify a valuable lead. Today we explore how more complex Lead Scoring methodologies on a company basis, can result in higher quality leads for the Salesforce.

Most Lead Scoring programs start with the premise that there are two ways to look at an individual prospect’s potential value: their Profile Fit (or explicit data) and their Engagement Score (or implicit data). Marketing organizations review the data available about a prospective customer that has been obtained in a variety of methods (form submissions, website visits, webinar attendance, etc.) and then ascribe different weighted values to each of the different data elements. Based on the aggregate value of the activities, a score is calculated which the Marketing team can then use to either pass the prospective customer to the Sales organization as a Marketing Qualified Lead (MQL) or continue to nurture through various marketing nurture campaigns.

Why Look at Company Level Lead Scoring
While this traditional approach to Lead Scoring does a very good job of determining if a contact has reached the threshold of MQL in a Business to Consumer (B2C) environment, it does not take into account the notion that in the Business to Business (B2B) environment, very often the value of a prospective lead is actually based on the activities of not one, but several individuals at the target company.

When scoring the potential value of a company as a lead, it is very valuable to look at all activities for all individuals at the company. As a good sales rep knows, different individuals at a company have different interests and different hot buttons. When a rep is reaching out to a prospect, she will target presentations to these people with a message unique to the role each person is playing in the buying cycle.

Similarly, when scoring leads, a Marketing organization would be wise to ascribe different values to different types of activities performed by people in different roles at the prospect organization. If each of these individuals were scored independently, not one of them might reach the MQL level. However, when scoring a complete organization, it is possible to rewrite the Lead Scoring program to view activities across different individuals and different activities, and arrive at a point where the sum truly is greater than the whole.

One quick example will show what we mean. Let’s assume the target market consists of Finance organizations looking for new accounting software. There are several key individuals involved in the buying process: the Finance Manager, the Chief Financial Officer (CFO), and the IT manager. While the CFO is the ultimate target, the Finance Manager is more likely to become involved early in the buying process. The IT manager will also be involved early in the decision process as well. If the Lead Scoring program ascribed a high value to a CFO title, and lesser value to a Manager level title, this company may linger in the nurturing stage, while the selling company waits for the CFO to visit the site and submit a form. However, if Company Lead Scoring is utilized, it would be possible for the prospect to achieve MQL if both the Finance Manager and the IT Manager do certain activities – where neither of them alone would have reached the MQL level. This would give the sales rep the ability to call on the CFO knowing that much of the early information gathering has already occurred.

Company Scoring PLUS Individual Scoring
Note also that company level lead scoring doesn’t necessarily obviate the need for individual lead scoring, but rather is often best used in addition to individual lead scoring. However the presence of company lead scoring should often cause a company to “raise the bar” for individual lead scores. This may result in fewer contacts passing through as leads, but more companies passing through, and more importantly all the leads passed to sales are now higher quality.

Company Level Lead Scoring is not simply the aggregation of individual lead scores, but rather a set of values ascribed across an organization such that the organization reaches MQL even when no individual would be worthy of that level.

The question then arises, what are the various methodologies to score at the company level, what situations do they each apply to, and how do they compare?

Definition of Terms
So that we can talk about company level lead scoring algorithms we first need to define the various components that may contribute to that. I’ve intentionally only given high level meanings to these labels, and not specific calculation methods because they will be calculated differently depending on the corporate sales model. We’ve added the following lead scoring fields that are similar to the existing Contact lead scoring fields, except that they are determined based on data gathered across the organization

Company Lead Score – Implicit: A measure of the Level of Engagement at the corporate level. This looks at implicit activities at all contacts in the organization.

Company Lead Score – Explicit: A measure of the Profile Fit at the corporate level. This examines demographic information captured about the organization as well as a composite of profile data for all contacts.

Company Lead Rating – Implicit: The weighted rating of the company based on the Level of Engagement score

Company Lead Rating – Explicit: The weighted rating of the company based on the Profile Fit score

Company Lead Rating - Combined: The final lead rating we will attribute to this company – similar to the Lead Rating for a contact, this value will determine if the lead is Marketing Qualified

Corporate Recency: The overall recency of activity within the corporation. Just as with scoring at the contact level recency of activity should also apply at the company level.

At the company level the calculation of recency becomes even more complicated than at the contact level, because recency in some way needs to be evaluated and weighted across multiple contacts. After all, companies don’t visit your website, contacts do. So calculating corporate recency must involve a calculation based on contact recency. And here again, we may choose to apply a weighting by title to which contacts affect recency the most.

We can also automatically apply recency at the company level if we apply it to the individual contact scores before they are rolled up to the company level. However, if we don’t apply recency in some way at the company level, then several contacts from a company that visited you three years ago could combine with a recent scale-tipping visit resulting in an MQL that really shouldn’t go to sales.

Simple Company Lead Scoring
Obviously, scoring at the company level is primarily for B2B situations and Company Lead Scoring can be as simple or as complex as necessary. Often simple is optimal. In a short sales cycle situation, anytime 3 or more people from a single company hit the website within the last 3 months we have an MQL. Done! This Lead Scoring program would simply calculate a Company Lead Score – Implicit and combine it with a Corporate Recency value to ascribe a Company Lead Rating – Combined value.

Another situation where Simple Company Lead Scoring is optimal might be selling services for heating or air conditioners. In this situation simply focusing on a few key titles related to “maintenance” might be best. This program would include values based on contact titles as well as Company Lead Score – ExplicitCompany Lead Score – Implicit to achieve a Company Lead Rating – Combined value.

Complex Company Lead Scoring
A good situation for Complex Company Level Scoring might be a complex sales environment that requires multiple high level purchasers. In that situation, looking for multiple high level titles over a longer period of time (6 months) might be appropriate. B2B doesn’t always mean company level scoring… however complex B2B sales processes would almost always benefit from Complex Company Lead Scoring. This Lead Scoring program might use each of the values defined above, looking at Company Lead Score – Implicit and Company Lead Score – Explicit to calculate ratings based on weighted criteria, including which pages were visited and which forms were submitted by different individuals in the company. After a critical level was reached across the target company, the Company Lead Rating – Combined value would achieve MQL status, and the lead would be passed to the sales team.

Conclusion
Developing a Company Lead Scoring program can bring tremendous advantages to an organization provided it is implemented in a well thought through manner. It requires knowledge of the target market as well as the activities that signal a qualified prospective company Lead. Moving from contact level Lead Scoring to Company Lead Scoring also requires a collaborative effort between the Marketing and Sales organizations and should be reviewed periodically to ensure highly qualified leads are being scored effectively.

Tuesday, April 20, 2010

Closing the Loop on Paid Search


Guest post from Elle Woulfe, Senior Marketing Programs Manager at Eloqua. Elle is one of the people responsible for our own internal use of Eloqua to optimize our marketing, and in this post, she looks at how we approach our investments in paid search marketing.


========================

Paid search ranks high on the list of marketing tactics for most B2B companies, but many marketers lack the ability to close the loop on search generated inquiries. Tying clicks to revenue in order to understand the business impact of SEM allows you to optimize spend and improve ROI.

Like most technology companies, Eloqua depends on both paid and natural search to find those buyers in the early stages of researching marketing automation vendors. We use a disciplined system of testing and optimization throughout our search program to produce the best results. But knowing which keywords generated the most inquires isn’t enough. We rely on Eloqua to track SEM leads from first click to close, generating a complete view of the revenue impact and the ROI of our search program.

For paid search, we treat each landing page and its associated keywords, as a campaign. When a visitor searches Google for a term related to marketing automation, like “lead scoring,” and clicks on one of our paid search terms, they land on an Eloqua landing page with a relevant offer for that term. When a user completes the form on the search landing page they are associated with that campaign in Eloqua. Now we can easily track the impact that search has on our sales funnel, but before that happens - our standard lead management process kicks in.

Clean Data Makes Happy Marketers

Eloqua’s automated data cleansing, lead scoring and routing processes are initiated once a prospect submits a form. In order to use our data for segmentation and targeting, lead scoring and analysis, we need an accurate dataset. When a contact enters our database it first goes through the contact washing machine. In this process, contact data is normalized and appended and the contact is associated to an account where possible. The contact is then scored based on fit and behavior and finally, this new data is synced to our CRM system, updating the relevant fields to give sales an accurate picture of prospect activity.

The contact’s most recent search term, as well as any other activities the prospect has taken is displayed in the CRM system so sales as a real-time view into prospect activity and interest.


How We Close the Loop

• A contact is associated to a search campaign when they complete the form. Now, as they engage with other Eloqua assets or campaigns, those interactions are associated to the contact as well, providing a complete picture of all the marketing activities that influence them.

• Eloqua campaign reporting automatically pulls opportunity, lead rank and revenue information associated to the contact and captured in our CRM back into Eloqua so we have a single view of search marketing success metrics and the impact of search influenced leads on the sales funnel.

• If a deal closes with the account our search lead is associated to, the search campaign is tracked as having influenced the prospect. The total deal size is automatically divided by all the campaigns that touched all the contacts associated to the account and the search campaign gets its cut. If multiple people at the account were influenced by search campaigns, all of those touch points are counted as influencing campaigns and get their fair share.

• In the event that our search campaign was the last touch point before a sales opportunity was opened with the account – the search campaign becomes the lead source directly attributed to that deal.

Picking the Winners

By setting up campaigns for each search landing page, we can easily see how each page is performing in terms of the number of inquires generated and follow the trail to see the impact on revenue. With the data pulled in from CRM, we can also see what stage of the funnel each lead is at and can quantify the impact each landing page (and associated keywords) have had on revenue generated. This holistic approach to tracking our search marketing performance makes it easy to pick the winners of our search campaign and calculate the return on our investment in paid search.

Wednesday, January 13, 2010

After the Call... sales lead disposition and marketing automation


Today's Eloqua Artisan post is a guest post from Mike MacFarlane, our own marketing operations manager. Mike is responsible for our own internal use of Eloqua, and as such he understands the detail needed in managing the full lifecycle of a lead, from scoring, to sales handoff, and back again.

In this post, Mike explores how to handle what happens after a salesperson calls a lead. As calls are completed, the custom sales/marketing business process for handling each possible sales outcome is managed by Mike's Program Builder workflow.

======================

I previously blogged about how you can use Eloqua to create Custom Activity Tasks through your CRM integration. Here at Eloqua, we use this ability in help drive efficiencies within our Lead Scoring program by creating custom tasks in Salesforce.com (our CRM system) whenever a lead is scored. Within these tasks, we pass over all the explicit information that was used to score the lead and also show the Contact Activity Overview (which is generated by Eloqua) so that they can see the implicit activity that assisted in the prospect’s score.


From a marketing standpoint, we have taken this process one step further by adding what we have called a “Lead Action” field on the task. This field is used by the sales team to provide an outcome to the follow-up on the scored prospect. We created a field on the lead scoring as a single select field so that there is consistency in terms of what the action was:


This information works in two ways:

1. Marketing can run reports within the CRM system to see how many prospects became “engaged” with the sales team after being scored
2. We can automate post-scoring processes within Eloqua to help limit the amount of reminder work that sales team needs to do

For example: a prospect is scored and a lead scoring task is generated within the CRM software from Eloqua. The sales rep follows up with the prospect but is only able to get their voicemail. The sales rep would then mark the Lead Action field within the task as “Left VM”. Once this Lead Action has been set within the task, using Eloqua’s Data Import functionality, we can pull this information back into Eloqua.

In this case, we have setup our import to pull in the Email Address stored on the task (this is what is used to uniquely identify the contact record within Eloqua), the Lead Action value populated by the sales rep and the Lead Action Wait field (which I will discuss below). The associated Eloqua contact is then pulled into a marketing automation program that we have created within Program Builder. From there, we have a series of decision rules setup to evaluate what Lead Action was selected within the task in the CRM. This is where it get REALLY powerful.

In the scenario above, the sales rep has chosen a Lead Action of “Left VM”. Based on that value, we have setup a series of post-scoring processes that will help the sales rep follow up with prospect (note that the processes shown below are based on our own internal business requirements, but you have the flexibility within Marketing Automation/CRM integration to customize this for your own internal processes):

1. Create a closed task indicating that the rep left a Voicemail for the prospect after being scored (this is done using the processes outlined in the Custom Activity Tasks in CRM Integration blog post)
a. This is done by setting the status in the task as “Completed” (or whatever value is used to indicate a closed activity within your CRM)
b. We customize the subject line of the task to “Voicemail” to help with reporting


2. Once the closed task has been created, we then take the original task that was created and do one of two things:

a. By default, we will place a 3-day reminder on the task for the sales rep to follow up on the voicemail (this reminder will automatically pop up on the 3rd day when the sales rep logs into the CRM software). We also customize the subject line of the task so that when it pops up within the CRM system, the rep knows exactly what the reminder is for.

b. If the sales rep wishes to wait a little longer than 3 days to follow up, we have given them the option to select their own follow up date. We have called this field “Lead Action Wait”. This field within the CRM platform is set as a date field so that the sales rep can choose a date in which they want to be reminded to follow up with the prospect after leaving the voicemail:


3. If the sales rep has chosen to pick their own date for follow up, instead of setting a 3 day default reminder date, we will use the date as selected the sales rep. This option is really helpful if the 3rd day of the reminder happens on a Saturday/Sunday.


4. Once the reminder task has been set, we will remove the task from the reporting dashboards that we have setup. This is important because it helps keep the reports populated with prospects that need to followed up on.

After this new reminder task has been created, we then place the scored contact into a contact group that we have called “Lead Action Hold” and hold them in this contact group for either 3 days or until the date that they have selected in the Lead Action Wait field within the Lead Scoring task. The purpose for this is so that if the prospect is scored again before the reminder date, we can evaluate this within our Lead Scoring program and add this prospect back to the sales rep’s dashboard in Salesforce.com. This lets them know that there has been more activity from the prospect since their first follow up.


This entire process that we have setup within Eloqua and our CRM has truly allowed us to do data driven lead scoring. We can now make confident decisions on who and what we want to score as well as determine what changes we need to make to our scoring matrix. Having the flexibility within your Marketing Automation system is crucial for a process like this to work and Eloqua’s Marketing Automation and CRM Integration capabilities allow us to do that quickly, confidently and successfully.

Wednesday, October 28, 2009

Custom Activity Tasks in CRM Integration


Guest post by Mike MacFarlane


Recently, Steve wrote about the various options for marketing automation/CRM integration – the integration between marketing and sales data. This got me thinking about how we at Eloqua use our integration capabilities with various CRM systems to help enable our sales team by passing over relevant, actionable information that we as a marketing organization can report on. One of the things we take a lot of advantage of are "custom activity tasks" that I can configure to do, or write, anything I need into Salesforce.com, our CRM system.

A while back, I wrote about setting up your Social Media GPS – showing a salesperson if a visit to your website (or Eloqua tracked page) was a result of click through from various social media sites, like Twitter, Facebook, LinkedIn, etc. This process was built on Eloqua’s ability for a marketer to create a simple activity task that fires over to the CRM once the activity occurs. This has been a great win for us at Eloqua, as we can now report and track social media activity within our CRM system in combination with what we are already reporting on in Eloqua (check out how to track Inbound Referrals in a past Artisan post). But this process can be used for many other functions in relation to what activities/action someone takes.

At Eloqua, we use this process in combination with our Lead Scoring program. Whenever someone is fed into our scoring program (either through a form submission or a website visit), they are scored and we will automatically create a task that is assigned to the appropriate salesperson that contains all the scoring details and explicit information.

To access the often called “Integration Tab” in Eloqua, simply click “Setup/Integration”


For the sake of keeping this brief and to the point, I am purposely by-passing a few steps here, but you can find all the documentation you need to do this within Eloqua’s Customer Central.

Simply select if you want to create/update an object in your CRM, then select the object you want to use (note that if you are “creating” an record within an object in your CRM and you want to update that record later on from Eloqua, you will want to store the CRM ID within a dedicated Eloqua contact field):


Next, you will need to choose which fields from your Eloqua database you would like to use to populate fields within the task record in your CRM. Notice that the mappings screen is broken out into two sections: the left hand side are the fields that reside on the object in the CRM – the fields on the right are the fields that exist in your Eloqua database. Simply drag the Eloqua field you would like to use and drop it into the object field on the left hand side. This screen will also highlight fields that are “required” in your CRM (if you have fields that are required to create a record in an object) and alert you if you have not mapped values to those fields.


If you have done this successfully, you will see the Eloqua field name show up in red and in italics:


Another option that you have is to hardcode values into specific fields OR you can combine hardcoded values with Eloqua fields. A really good example of this would be in the Subject line of the task (this is what the salesperson would see initially when they receive the task). In this example, I want to make it obvious to the salesperson that this task is related to lead scoring, so I am going to construct my subject line to read “FIRST NAME LAST NAME just went through our scoring program”. Here is how it would look in the field mapping screen:


So when this call fires to the CRM, the task will pre-populate with the first and last name of the person that just went through the lead scoring program.

Once I have completed my mappings, I can then use the built in External Call tester which allows you to test the call you just made before you decide to push it live. Eloqua will show you the data that exists in the object before the call fires and what data exists after the call fires.

Once you are fully satisfied with how your new External call works, you can add it into Program Builder as an Integration Action to fire when someone hits that specific program step.

Thursday, October 8, 2009

Prospect Profiler - As an AutoHotKey Shortcut


In the second post in a two-part series on Prospect Profiler, one of our keys to sales enablement, Ben McPhee continues exploring the topic he introduced in his first post; Prospect Profiler as a stand-alone. This time, Profiler is accessed as a AutoHotKey shortcut from within your email client.

==============================================


Option 2: Take a shortcut from your email client!


This is REALLY cool. We don’t officially support or have any direct integration with this software, but if you run AutoHotkey®, you can easily jump from your email client (e.g., Outlook) straight to a contact’s Prospect Profiler record with just the press of a few buttons.

Click the following link to download the custom AutoHotkey script that we wrote: http://www.mediafire.com/?sharekey=58ec0aca75258a2ac79b87b207592a1ce04e75f6e8ebb871

When you are prompted, Save the file to your desktop. Once it is saved to your desktop, select it and drag it into your Start Menu > All Programs > Startup. Drop the file there so that the file runs every time you start up your computer. Having this script run on startup allows you to always use a hotkey combination to view a Prospect Profiler record for a contact.


Once the script has been ‘installed’ successfully, the next time you start up Windows, you should see an AutoHotkey icon appear in your toolbar:


Now all you have to do is the following:

1. Select an email address from your email client (make sure you select the entire email address, rather than the address book display name):


2. Copy the address: CTRL + C
3. CTRL + SHIFT + Z: This runs the AutoHotkey script
4. Select “Yes” to the prompt confirming that you want to look up the activity for the contact with the email address you copied


Your internet browser will now automatically load up with a view of the Prospect Profiler for the contact you identified! Going forward, all you need to do is copy an email address and then hit the hotkey combination above and you can load up an activity overview of your lead or contact in seconds.


Again, if you have not already logged into the Eloqua application or stored your user credentials with the Profiler, you will be prompted to enter your company name (no spaces), your Eloqua user name and your Eloqua user password. Make sure you select the “Remember Me” option, then log in.


Note: If your user account does not have access to Prospect Profiler (it is an add-on product offering), you will get a message to this effect. Contact your CSM if you are interested in Prospect Profiler.

Monday, October 5, 2009

Prospect Profiler - without a CRM System


Today's post on Artisan is another guest post, this time from Ben McPhee, on our Product Management team. Ben is most well known for his recent work on Prospect Profiler, one of our keys to sales enablement, but he is also responsible for our work with the sports marketing vertical where we work with a number of professional sports teams, arenas, and racing facilities.

In this post, Ben revisits Prospect Profiler, and looks at ways in which it can be used in stand-alone manner, without relying on being embedded in a CRM system as it normally is.


==============================================


No CRM system? No problem. While Eloqua’s Prospect Profiler is most effective in the context of a Lead or Contact record, we recognize that context may not always be ideal or available. There will be instances in which sales reps would like to simply see a contact’s activity without having to navigate through a CRM system and other instances where reps have not been provided a CRM tool at all.

Focused on making both marketing and sales as successful as possible in as many scenarios as possible, we want to let you know about some alternate routes/shortcuts your reps can take to get to Prospect Profiler and acquire a more in depth understanding of their prospect’s interests and behaviors.


Option 1: Just get on the internet and go to it!

Go to http://prospectprofiler.eloqua.com/
If you have not already logged into the Eloqua application or stored your user credentials with the Profiler, you will be prompted to enter your company name (no spaces), your Eloqua user name and your Eloqua user password. Make sure you select the “Remember Me” option, then log in.

You will then be presented with a search bar – going forward, when you go to the URL above, you will be automatically taken to this search interface. Type in the email address of the contact whose profile you wish to view (notice that once you type in the ‘@’ symbol you’ll get a list of possible contacts from which to choose), then hit Search.


The page will then load that contact’s profile with all the standard features of the Prospect Profiler – hover-overs, drilldowns, previews, etc.


Option 1B. If you’re a Mac user, set up a dashboard

In case you’re a Mac user, we thought we’d point out a quick and easy trick so that you can have quicker access to the great information available in Prospect Profiler.

Open Safari and navigate to http://prospectprofiler.eloqua.com/
Login to the profiler using your Eloqua login info (make sure you select the “Remember Me” option)
Choose "File" and "Open in Dashboard..."


A purple bar will drop down from the top of your browser window - click on the "Add" button at the right end of that purple bar.

You'll now see prospect profiler living on your OS X dashboard making it instantly accessible at the click of a button (or swipe of your mouse if you're using expose)


Styling Tip: You can change the style of the dashboard frame by clicking on the small "info" button located in the bottom right corner of the Profiler dashboard.

With these techniques, you can make Prospect Profiler, and the insights it provides into prospect buying behaviour, available anywhere, without needing the context of a CRM system.

Note: If your user account does not have access to Prospect Profiler, you will get a message to this effect. Contact your CSM if you are interested in Prospect Profiler.

Monday, September 28, 2009

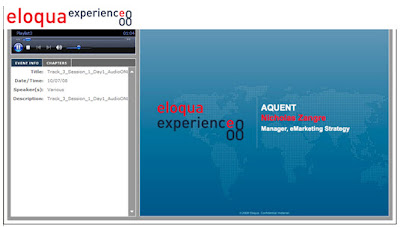
Eloqua Experience: Highlights from 2008 - Nic Zangre, Aquent


Continuing on the theme of Eloqua Experience 2009 that we started recently, I wanted to continue with a highlight presentation from Eloqua Experience 2008 that remains very relevant today. Nic Zangre from Aquent would clearly be in the theme of this year’s “Rock Star” track (see the agenda for more details) with his detailed presentation on data management and advanced approaches to sales and marketing alignment.

If you’ve taken Sales and Marketing Alignment to a new level, as Nic did, don’t be shy about submitting it for consideration for an award at the Markies Gala on Tuesday night, where the industry’s best marketers will be celebrated in 12 categories. An entire category is dedicated to Sales and Marketing Alignment, as it is such an important topic. Remember, the deadline is fast approaching on Friday, October 2nd so you’ll want to submit soon.

In this presentation, Nic draws on his experience at both Fast Search and Aquent, in order to provide a very deep and hands-on presentation about data management, and the nuts and bolts of lead hand-off to sales:


Some highlights from the presentation if you want to use the “Chapters” tab to skip ahead (once the audio has loaded):

4:45 The CRM Engine
Nic’s perspective on the lifecycle of lead flow from marketing to sales, and the feedback to marketing in terms of successful results and the levers available to you.

7:15 Symptoms of Engine Trouble
How does data quality affect marketing and sales results
Can you identify segments and territories effectively?

13:40 Right Tools
Looking at which Eloqua tools work for which data challenge you might be having
- Decision rules
- Contact Groups and Filters
- Deduplication Rules
- Data Tools (validation, update, match rules)
- Multiple Program Feeders


16:20 Garbage In, Garbage Out
Nic looks at dealing with duplicated data, and managing a clean database from that point forward through data validation

20:59 Salesforce.com Dashboards
Aaron Rothschild looks at some sales dashboards that can be based on marketing activity once a good marketing process is in place.

27:10 Sales Needs
Nic explores territory distribution and advanced lead routing in order to handle lead allocation by geographic territory, especially in cases where territories or sales staff have changed

28:35 CRM Update Program (through to CRM Cleanup at 40:00)
A deep dive into the way that leads are identified, matched to territories, routed, and sent over to Salesforce.com. This is a very interesting and deep section that looks at a very robust process for lead handoff and management. If you are looking at advancing how you think about sales and marketing alignment, this is a great section to watch in full.

41:55 Results
Some very compelling, real, and clearly measured results from Nic’s work.


Remember, Eloqua Experience is in San Francisco on Nov 2nd - 4th, 2009, and is the event of the year for any marketer focused on marketing automation and demand generation. Hope to see you there.

Thursday, August 13, 2009

Lead Scoring for Sales Enablement - Visual Cues in Salesforce.com


We all know that sales people are visual people. We touched on that quite a bit in last week's post on sales enablement. Rather than interpret a list or a number, they would much rather quickly look at a picture to indicate whether a person was qualified as an individual, or hot or cold as a prospect.

This visual orientation is one of the main reasons for the popularity of Prospect Profiler among sales professionals, as it provides this quick, visual view of what is happening with a prospect.

However, even without Prospect Profiler, these visual cues can be extremely valuable to your sales team. Having a visual indication of whether an individual is qualified and/or interested, is something you can configure quickly and easily within salesforce.com or your CRM system of choice, without any additional cost.

To do this is very simple. Essentially, you are building custom formula fields, where the "formula" returns an image that represents what you are interested in displaying.

To get started, go to the setup area, and under Leads->Fields, scroll down to Lead Custom Fields, and add a New field.

From here, you will be guided through a quick wizard to set up the field. The type of field you want to create is "Formula" as we will be applying some logic to the image display, and the output type is Text.

Provide a field label for your field, such as if we are building an image of 0-5 stars to represent how qualified a person is as a buyer (explicit score), we might label the field "Explicit Rating Image".

From here, you are presented with a Formula screen - select the Advanced Formula tab to get started. Note that we are just creating a formula to look at the Explicit Lead Score (which is already present) and return an image. We are not building a formula to actually score the leads, which will have been done in Eloqua, based on the best practices for lead scoring, and passed into Salesforce.com.

There is a small amount of code being used here, but nothing to be overly concerned about, as you can edit an existing code sample in order to build the exact image you require.

When we are looking at the explicit score, it may vary between 0 and 100, so we'll return 0 to 5 stars based on where it sits in that range. The first thing we need to do, however, is to tell the formula which field it is looking at to find your lead's explicit score.


Click on "Insert Field" and a dialog box will give you a list of your fields. When you select it, the internal name for that field is inserted in your code. You'll need to replace the internal name in any of these examples with your own in order to have it work in your CRM system.

For this example, to look at an explicit lead score field called "LS_Explicit_Score" (replace this with your own), and display stars based on the range of values in the score field, the code would be as follows:

IF( LS_Explicit_Score > 80,
IMAGE("/img/samples/stars_500.gif", "5 star"),
IF( LS_Explicit_Score > 60,
IMAGE("/img/samples/stars_400.gif", "4 star"),
IF( LS_Explicit_Score > 40,
IMAGE("/img/samples/stars_300.gif", "3 star"),
IF( LS_Explicit_Score > 20,
IMAGE("/img/samples/stars_200.gif", "2 star"),
IF( LS_Explicit_Score > 10,
IMAGE("/img/samples/stars_100.gif", "1 star"),
IMAGE("/img/samples/stars_000.gif", "0 star")
)))))


You can see that this also takes into account the range of scores (ie 0-100) you have in your scoring, so it is important to make sure your lead scores don't grow with time more than appropriate, and that the right scoring caps are in place. This ensures that your scores remain cleanly between 0 and 100 as they should.

With this in place, you can then define who the field is visible to, and edit the Lead Layout to add in your field where appropriate. Generally, it is a good idea to drage the field for the images next to the number for the score so your sales team begins to get a feel for the underlying numbers.

This same process can also be followed for the other dimensions of lead scoring, such as implicit scoring (how interested a person is). Follow a similar process, but build your formula off of the implicit score. If you wanted a formula that would use a Consumer Reports style set of partially colored circles to represent the score, the following would work:

IF( LS_Implicit_Score > 80,
IMAGE("/img/samples/rating5.gif", "High"),
IF( LS_Implicit_Score > 60,
IMAGE("/img/samples/rating4.gif", "Med-High"),
IF( LS_Implicit_Score > 40,
IMAGE("/img/samples/rating3.gif", "Med"),
IF( LS_Implicit_Score > 20,
IMAGE("/img/samples/rating2.gif", "Med-Low"),
IF( LS_Implicit_Score > 10,
IMAGE("/img/samples/rating1.gif", "Low"),
IMAGE("/img/samples/s.gif", "no rating")
)))))


Again, you will want to replace LS_Implicit_Score with the name of the field in which you store your implicit score. Continue this process for any other fields you like.

If the field you are building a rule from has a ranking or stage such a Hot/Warm/Cold or A/B/C, rather than a score that comes in a range (0-100), you can use a slightly different way of writing the code, using a "Case" statement, as follows (again, in this example, replace "Rating" with your own field, and the A/B/C values with the values you expect in that field:

IMAGE(
CASE(Rating,
"A", "/img/samples/flag_green.gif",
"B", "/img/samples/flag_yellow.gif",
"C", "/img/samples/flag_red.gif",
"/s.gif"),
"status color")


With this in place, you can easily provide your sales team with the visual cues they need to quickly and easily understand which of their leads are qualified, which are interested, and which require follow-up.

Thursday, August 6, 2009

Getting Started with the Eloqua Web Services API


Aaron Riley joins us this week as a guest blogger. I'm very excited to have Aaron contribute a few posts as he is one of our senior product consultants, and spends a lot of time helping our clients and partner work with the Eloqua web services API.

I hope to feature a number of interesting extensions of the Eloqua platform here in the coming months. Some of the innovations I have seen that extend the marketing automation or multi-channel marketing elements of Eloqua, especially from our partner community, are quite exciting.

If you have been thinking about getting started with the API to build your own extensions, here's Aaron with a quick walk through of how to get started


===========================================


Web Services and Demand Generation


Tighter business alignment and decision making requires more integration, automation, and the ability to report across multiple systems. Using web services, you can connect back office systems, CRM systems, databases, social media sites, and other offline media with Eloqua.


At Eloqua, our web services API allows for:


1) Bi-directional integration between Eloqua's marketing automation platform and on-premise or custom CRM systems


2) Connecting marketing automation with social media, such as Facebook, Twitter, or Linked-In


3) Automating lead nurturing workflow in concert with other web services such as telemarketing or inbound SMS providers


4) Exporting your marketing data to a data warehouse for Business Intelligence (BI) and reporting for more advanced marketing analysis than what is native to Eloqua


The API gives access to the contact, company, visitor, groups, and data card entities, as well as marketing activities. We currently have over 100 clients using the API and have certified partners who can help.


Getting Started


1) Reach out to your Customer Success Manager (CSM) and ask for the API to be enabled. It won't be enabled by default in your instance, but we'd be happy to turn it on for you.


TIP: Access Customer Central for documentation and examples.


2) Create a user in Eloqua and add them to the API User security group.


TIP: Test your user and password.


3) Import the WSDL into Visual Studio 2008 as a service reference.


4) Run the following “Hello World” VB.NET snippet to get you started:


TIP: Customer Central has code samples in other development languages if you prefer

Public Class Test
Public Sub New()

Dim elqService As New EloquaAPI.EloquaServiceClient()
elqService.ClientCredentials.UserName.UserName = "COMPANY\API.USER"
elqService.ClientCredentials.UserName.Password = "********"

Try
Dim result As EloquaAPI.DescribeEntityTypeResult
result = elqService.DescribeEntityType("Base")

Dim entry As EloquaAPI.EntityType

For Each entry In result.EntityTypes
Console.WriteLine(entry.ID)
Console.WriteLine(entry.Type)
Console.WriteLine(entry.Name)
Next

Catch exS As System.ServiceModel.FaultException
Console.WriteLine(exS.ToString)
Catch ex As Exception
Console.WriteLine(ex.ToString)
End Try

elqService.Close()
End Sub

End Class

You are now connected and ready to integrate your marketing efforts with the rest of your business, update your data warehouse, or further your automated lead nurturing efforts.

Tuesday, August 4, 2009

10 Ways for Marketing to Enable the Sales Team


Marketing and sales often don't enjoy the best of relationships. The great news is that this situation has an amazing opportunity to change. Marketing can, right now, provide their sales team with insights that can make a tremendous difference in their lives and drive bigger commission cheques for them. Nothing changes a relationship with your sales team faster than a larger commission cheque.


Here are 10 things you can do, with Eloqua and your CRM system that will quickly deliver a lot of value to your sales team:

For Their Territories:

1) Territory Traffic Light Dashboard - For each sales person's territory, configure them a "traffic light" dashboard that gives them an instant view of which of their accounts are showing buying interest.


Here's how to build a Territory Traffic Light Dashboard


2) Territory-Based Email Alerts - configure for each rep, automatic email alerts for the accounts they own. This will give them a real-time indicator of buying interest, and let them manage the accounts proactively based on buyer interest.


Here's how to set up Territory-Based Email Alerts


3) Unknown Company Visitors - Show them which companies are on the website doing research who may not currently be known to your organization, give you a great opportunity to initiate a conversation as a buying process starts at that organization.


Here's how to configure a report on Unknown Company Visitors


For Their Accounts:


4) Account Insights and Key Players - Give each sales person a roll-up view that shows, for each of their accounts who the people are who are showing interest and what they are interested in. Armed with this insight, your sales team can quickly determine what the key conversations they need to have are.

Here's how to show sales a report that provides Account Insights and Key Players


5) Configure Your Social Media GPS - Identify social media activities and pass those through to your CRM system so that your sales team can understand which accounts, and which individuals are engaged in social media conversations. By presenting the prospect's social media activity within your CRM system, you enable your sales team to understand new context to the prospect interaction without leaving an environment they are comfortable with.


Here's how to Configure Your Social Media GPS


6) Find Sales the Right Contacts - Integration into role-based discovery services to drive real insight into who can make a purchase decision, not just a raw list of quasi-targeted and out of date names. Often, the person doing the bulk of the research is not the ultimate buyer, so discovering the names of the inviduals in the right role can be very beneficial to your sales team.

For Their Contacts or Leads:


7) Prospect Profiler for Sales Insights - enable Prospect Profiler in order to provide a rich, interactive, graphical view of each individual's interest. This allows your sales team to guide conversations and know who is showing the right level of buying interest.
Here's information on Eloqua's Prospect Profiler for Sales Insights

8) Show Areas of Prospect Interest - Configure your CRM integration to identify areas of your website that a person is showing interest in and highlight those within their concact or lead record in your CRM system. This enables sales to immediately know which topic of conversation will be most warmly received. Be sure to also use graphical imagery to more clearly highlight interest.
Here's how to Show Areas of Prospect Interest to sales in your CRM system

For Your Communications

9) Send-on-behalf-of-Sales - Have your marketing team send outbound email campaigns on behalf of your sales team. Not only does this drive a much higher response rate to the email campaigns, but it also builds upon the salesperson's relationship with the prospect and provides a great opportunity to start dialogs.

Here's how to set up your marketing campaigns to be Sent-on-behalf-of-Sales

10) Provide Sales with Content - provide marketing-created content to your sales teams in their Outlook desktop email environment so they can find great content, personalize it, and send it in a trackable way to their prospects quickly and easily.

Here's how to Provide Sales with Content within their Outlook environment


There are many ways that your marketing team can enable your sales team, and the 10 ideas above are great ones to get started with. In today's environment, it is possible for marketing and sales to have a much stronger relationship than they ever have had before, and it all starts with sales enablement.

Tuesday, July 28, 2009

Optimizing your Marketing Automation: Tips from the Guru


This week's post is a guest post from Andrea Corey, our VP of Systems Architecture, and the guru of Program Builder optimization. She and her team are responsible for all the scale and speed initiatives behind Eloqua's architecture, and were the key folks behind the work that was highlighted in the recent Dell case study on Eloqua's marketing automation platform performing at one billion transactions per day.


In this post, Andrea offers a number of great tips on how to think about your programs so that they operate as smoothly as you need.
Enjoy,

Steve


====================================


Program Builder offers two main processing modes: Regular mode and Batch mode. Each can be effective at enabling many Marketing Automation needs; what follows are some helpful explanations and suggestions for optimizing your programs.

Regular mode, the default mode, is ideal for lead nurturing, free trial follow-ups, event follow-up and similar processes where you wish to send out communications or evaluate contacts over the course of a period of time. Regular mode programs process program members at 15-minute increments. In case you are new to Program Builder, this means that every 15 minutes, program members will move from one step to the following step in the program (assuming they are not waiting in a step due to a time-based rule).


Whether there are one or more decision rules between the two steps, all decision rules are evaluated in sequence in the same cycle. Therefore, to optimize your programs, you may wish to employ decision rules in sequences, rather than placing steps between the decision rules.
You will also want to avoid “empty steps” such as the first step in the program – many new users don’t realize that the first step in a program can in fact perform an action.

Now you’re wondering how to avoid that first empty step if your first operation is to run a decision rule in order to branch the records… A tip to consider is to have your members enter the program at different steps – based on what you know about the records when you add them to the program. For example, if your members are flowing into the program from a form, consider multiple conditional steps that push members into specific program steps.
Alternatively, you can establish several feeders, instead of just one, in order to optimize where the members start in the program. These are advanced configurations, and may require extra planning and design consideration, but they can be useful for decreasing the time it takes to run your automated processes.

If you find that program members are taking longer than you would like to progress through to the end of your program, you may want to consider doing your marketing automation in Batch mode. Batch mode is often suitable for lengthy or complex workflows and for bulk data processing such as data normalization. In this mode, members are fully processed from the start of a program through to the end of the program every two hours.
Even better, you can prioritize Batch mode automation programs such that they are evaluated in a specific sequence. Some customers have set-up several programs sequenced in batch mode – very complex and granular lead scoring, lead rating, lead assignment programs that are modular, yet process this entire set of processing every two hours. You can see how this enables far more complex logic to be efficiently leveraged.


I must add a disclaimer regarding Batch mode. When running in Batch mode, marketing automation programs do not maintain the detailed step-by-step history that can be useful when initially building and testing programs, so I recommend that you enable Batch mode once you are satisfied with your program’s configuration.

I’d love to hear feedback on how we can improve Program Builder to make you more effective in your marketing automation.

Thursday, July 16, 2009

Sales Enablement: Account Traffic Light Dashboards


Enabling your sales team to succeed based on your marketing automation investments means ensuring that you can show them insights into their accounts and territories that they might otherwise not have been able to see.

An excellent way to do this is through the use of a "traffic light" dashboard that shows each salesperson, for their own territory, the hot, warm, and cold accounts that they own.

The use of a "traffic light" dashboard, to do this in green, yellow, and red has proven an excellent tool in many sales organizations as it allows salespeople to determine, at a glance, which accounts are showing buying interest.

To set this up in salesforce.com is quite easy. I've included the salesforce.com instructions here, but a similar process for Microsoft CRM or Oracle CRM On Demand should also work.

The first step is to create a report that rolls up the individual lead scores of the contacts in an account to the account level itself. Note that to do this project, we're relying on you already having set up a good lead scoring process, with that data integrated into your CRM system.

Build a report on "Accounts & Contacts" and select the "Contacts & Accounts" option to bring in data from both the contact (ie, their lead score), and the account (account name, etc).

When you are asked for a summary type, select a Summary report in order to allow us to aggregate the lead scores of each contact in the account into an overall lead score.

Although a sum of individual contacts' lead score is not the most perfect way of defining the exact score of an account, it does provide an excellent, directional view of which accounts are showing interest and should be contacted.

You will be asked to select your Summary Fields. Under Standard Summary Fields, select a Sum for your Explicit Lead Score field. This process can be repeated for Implicit Lead Score also, at a later point to build a second traffic light dashboard component based on buyer activity. Both implicit (how interested) and explicit (who) provided unique and valuable dimensions of lead scoring, and are worth dealing with separately.

With this sum field selected, you will be asked to select how to roll up your data. We'll roll it up by Account Name in order to show the aggregate lead score for each account in a rep's territory. Note that this view provides an account level overview of which accounts to talk with, and very elegently complements the sales insights provided by Prospect Profiler to give you a good detailed view of an individual's area and level of interest.

The sort order of this column is not important as we will be changing this later for the dashboard.

The next step is to select the field that we are interested in. As we will be rolling up by account, the contact fields are not of interest and can be deselected. For account fields, select those that are of interest to you for a high level view, such as Account Name, Account Owner, and Industry.


Similarly, on the next step, the order of the columns can be selected in any way you would like. It will not affect the final dashboard, so order the columns as you wish.

Selecting your filter criteria now allows you to build a report that is unique to each salesperson for their territory. Whether you use account ownership, or more detailed data-level criteria to define an account ownership structure, you should be able to build an appropriate filter set to allow each salesperson to see accounts in their own territory.

The one thing you will want to do on the filter page, under advanced settings, is to hide report details. This hides contact level details, and allows the report to only show the account level rollup of the overall lead score.

The display options on the next step are also not relevant as we will be showing this report in a dashboard, which will determine its own display settings, so just click Run Report to generate the report and verify that you have a rolled up lead score for each account in the target territory.

Save this report as we will use it to generate a dashboard from. You may again wish to create a similar report based on implicit lead score, and you will likely see demand from each of your sales reps for a similar report in their own territory, so you will likely end up with a series of these reports.

Now that we have a report created, the next step to tackle is to create the traffic light dashboard based on that report.

The common way to do this is to create a new, three column dashboard, and add in each view as a component with that dashboard to give salespeople a territory map to work from.

When you have created a dashboard, add in a component to represent this report. Make the component a "Table" component type, and give it an appropriate title such as "My Territory's Accounts by Explicit Score".

Select the report you have just created as a source report in order to bring in the data on accounts with rolled up lead score. You will likely want to set the Sort order to "Row Value Descending" in order to show the highest scored accounts first, and usually a maximum of 25 or 50 values displayed keeps the report manageable.

You can then set, based on your lead scoring ranges, where you want the traffic light colors to show. For example, if you have a 0-100 scoring range, you may want 0-30 as red, 31-80 as yellow, and 81-100 as green. You will find that this clearly shows why it is so important to define lead scoring caps and buckets so that scores do not get unweildy and are maintained within a workable range.

With that in place, you are ready to go. Save your dashboard, and work closely with your sales team to ensure that you have the right ranges identified, and the right way of defining territories to ensure that they are seeing the highlights of their own accounts.

Your sales team will be able to quickly discern which accounts are showing interested and should be called, and by doing so, will quickly become much more effective in their selling.