Monday, April 18, 2011

Rapleaf Consumer Interest Data within Marketing Automation


If you’re marketing to consumers, understanding their interests, demographics, and location is important if not vital. However, when working online, you are often challenged with the fact that you’re working with little more than an email address. Translating a bare email address to that level of insight requires a database that is specially built for the purpose. That’s where Rapleaf, a provider of demographic and interest data from social media comes in.

Rapleaf works from an email address to parse the social web and return data on an individual’s location, age, gender, interests, and other data. This data is now immediately available via a Cloud Connector from within your marketing automation programs in Eloqua. With the data available, you can then communicate, personalize, nurture, and score accordingly, resulting in a significant boost in your results.

To get started, just snap in the Rapleaf Cloud Connector into your Eloqua instance using the typical way to install a Cloud Connector. You’ll find it on cloudconnectors.eloqua.com, Eloqua’s library of Cloud Connectors, under Contact Data. With the connector installed, you can begin building a marketing automation program to take advantage of the connector.

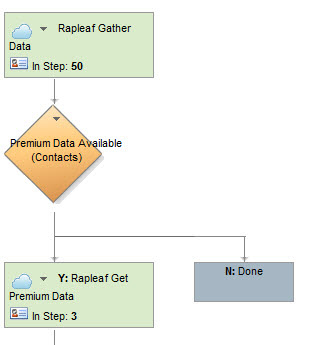
To do that, add in a step into your program that grabs data from Rapleaf. The data on age, gender, and location is provided for free, and with it, a flag of “Data Available” is provided for any data field that has premium data available for it. Rapleaf will provide you with “API Keys” to access your data, and each key has access to different data fields with different price points per query. Be sure to start with a key that only has access to free data so you can first see if any data is available. If data is available, you can requery for it with a different key that has access.
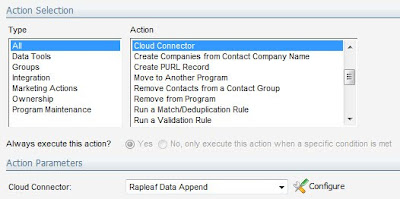
For each step that queries Rapleaf, select Cloud Connector as your step type, and select Rapleaf Data Append as the connector type. This will give you access to the configuration button that lets you configure the connector.
For configuration, paste in your API key from Rapleaf, and indicate whether you want to store the returned data in contact fields or in an attached custom data object (data card).

With that selected, under the field mappings tab, you can select what fields, on the contact or the custom data object, you would like your data returned into. Note that most of the data fields, even if they appear to be numeric (like Age and Income) are actually delivered as ranges ("35-40"), so they are text fields not numbers.
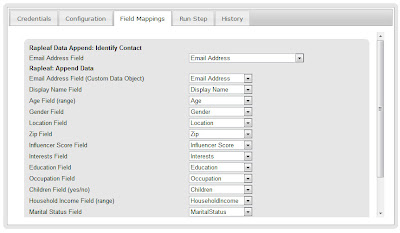

If data is available, but your Rapleaf API key does not have access to it, you will see a value of “Data Available” returned. You can use this value in guiding decision rules within your marketing automation programs in order to decide whether to requery Rapleaf to get the additional data.
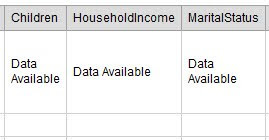


With that set up, you can use the “Run Step” tab to manually run the connector a few times to make sure it all works as intended, and then when you are happy with it, move to the Configuration tab to check off the “Enable Step” checkbox to allow the step to run automatically.
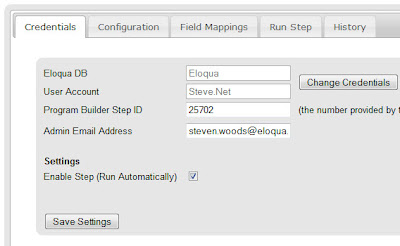
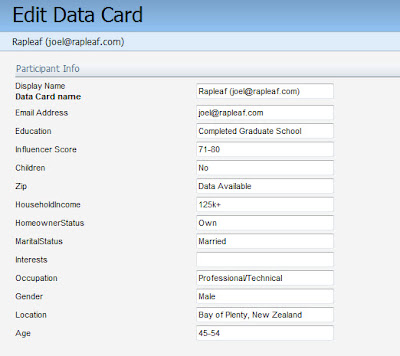
Now, Rapleaf data on demographics, age, interests, and a variety of other fields will flow into your Eloqua marketing database automatically. As soon as it’s there it is immediately available for segmentation, scoring, analysis, and nurturing.

Please keep your feedback coming on this Cloud Connector and any others you’d like to see.

Tuesday, April 12, 2011

Cvent Integration with Marketing Automation


As the leading event management platform, Cvent serves the needs of event marketers everywhere. Many marketers work with both Eloqua and Cvent; Eloqua marketing programs providing the drive to compel attendees to register, and Cvent managing the event attendance, payments, and logistics.

What is needed, however, is a way to immediately know, within Eloqua, when a person registers for the event in Cvent. This is critical as you will want the marketing automation programs that you are using to drive event attendance to cater themselves to the fact that the person has already registered.

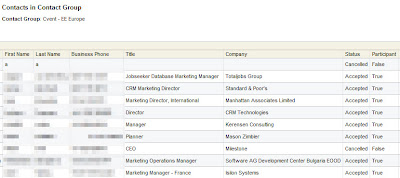
To do this now is easy, as there is an Eloqua/Cvent connector that automatically feeds registrants from Cvent into Eloqua and places them within a contact group. From there, they can be fed into a marketing automation program, used for analysis, or used as a reference in any follow-on communications.

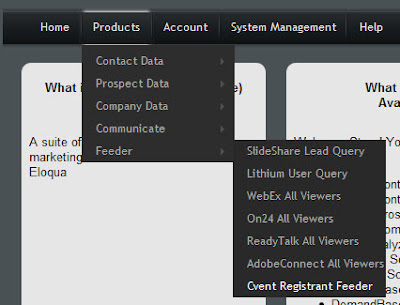
To get started, go to Feeder -> Cvent Registrant Feeder within cloudconnectors.eloqua.com . Feeders do not require a Program Builder step as they just run on their own and feed data directly into Eloqua.


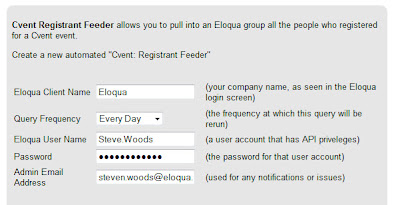
Create a new Cvent Registrant Feeder step, supply your Eloqua credentials, and specify how often you want the Feeder to run. Usually once a day is sufficient.


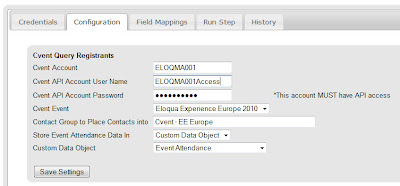
In the configuration screen that appears next, add your Cvent account details. Note that this MUST be an API enabled account. Talk with your Cvent account rep if you do not have an API enabled account.

In enabling your API account the Cvent team will need to specify which IP addresses should be allowed. Have them enable the following ranges:

65.55.*.*
65.54.*.*
65.52.*.*
70.37.*.*
207.46.*.*
209.240.*.*


For those familar with CIDR notation, the precise ranges are as follows (note that 65.55.80.0/20 does NOT mean 65.55.80.0 to 65.55.80.20):

65.55.80.0/20
65.54.48.0/21
65.55.64.0/20
70.37.48.0/20
70.37.64.0/18
65.52.32.0/21
70.37.160.0/21
207.46.192.0/20
65.52.0.0/19
65.52.48.0/20
65.52.192.0/19
209.240.220.0/23


With an API account specified, hit Save to refresh the list of available events in Cvent, and select the event you are interested in pulling data for. Specify whether you want the bulk of the attendance information stored in the contact record or within a custom data object, and select a Contact Group to place the retrieved contacts into.


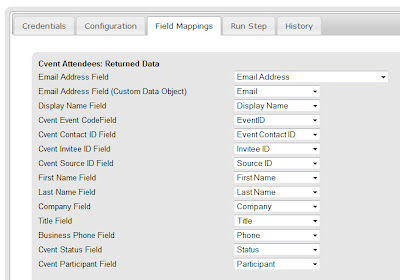
On the Field Mappings tab, specify the contact fields, or custom data object fields that should be used to store the information from Cvent. A wide variety of demographic, attendance, and participation information is retrieved.


With this set up, you can use the Run tab to test run your feeder. You will see within Eloqua, the people who registered for, and/or attended your event show up automatically.


To have this run automatically on the schedule you originally specified, go to the Credentials tab and select the Enable Step checkbox.


With this automated connection set up, you will be able to better cater your event marketing to what is happening with your Cvent registrations in real time. Please don't hesitate to provide feedback as you explore better ways to run your events now that Cvent and Eloqua can be seamlessly connected.

Monday, April 4, 2011

String Concatenation in Marketing Automation


Recently we looked at a string manipulation Cloud Connector that allowed trim, search and replace, and regular expression (RegExp) functions against string values in Eloqua contact records. To add to this capability, we also have a Cloud Connector that allows for concatenating multiple values from different fields together into a combined value.

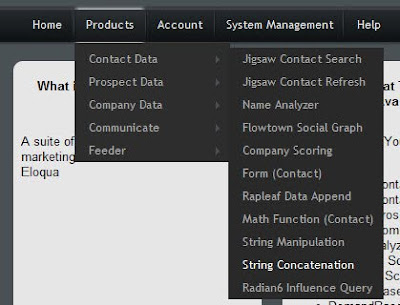
To add this connector, follow the normal process for adding a Cloud Connector, using the configuration URL you can find at cloudconnectors.eloqua.com under Product -> Contact Data -> String Concatenate.


With the connector installed, begin using it by simply adding a step to your marketing automation program at any point you'd like to concatenate string values within contacts in the program.


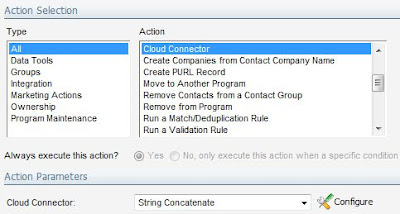
For this step, set its step type as Cloud Connector, and select String Concatenate as the Cloud Connector step type from the drop-down list. Now, click Configure to begin configuring the rules for your step.


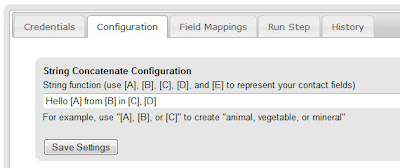
Under the configuration tab, you can define the structure of the final string you're interested in creating. Use [A], [B], [C], [D], and [E] to represent the values you'll be passing in from other contact fields, and then add any other text you'd like to the string concatenation rule.


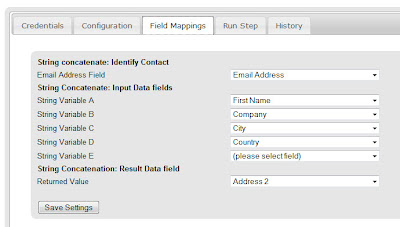
On the Field Mappings tab, simply configure the fields that you'd like to use for each variable, A, B, C, D, and E, and the field you'd like to return the results to.


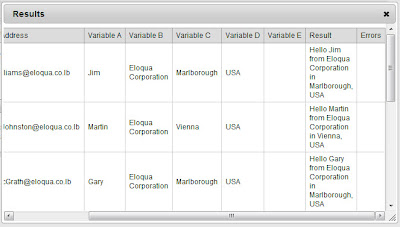
That's all that is required, and you can use the Run tab to quickly check that the result is as you anticipate.


Once you're happy with the rule as you have it set up, use the Enable Step checkbox on the Credentials tab to set the step to run automatically. With it running automatically, any contacts that pass through the step will have the string concatentation values you specify automatically run.


With the combination of this step and the string manipulation step, you should be able to do almost anything you need to with string values in your marketing database. Don't hesitate to provide feedback if there are more areas that you feel necessary.