Friday, January 30, 2009

Simple Experiments; Random Splits


There are many times when we as marketers want to run quick tests, experiments, or trials. Most times, this involves splitting a group into a number of random test cells. Luckily, there's a very easy way to do this with Eloqua that does not involve any efforts in Excel or other tools.

If you have a group that you want to split, go to the Data Manipulation menu, and select "Split Contact Group" from near the bottom of the menu. This will bring up a menu that lets you configure exactly how you want to split your group. You can split it into a predetermined number of groups, each of equal size, or you can create groups of a fixed number of members, with the left-over contacts placed in a final group.

You can also configure where (which folder) you want the resulting groups placed. Note that the original group will not be affected. New groups will be created, but the contacts will all remain members of the original group.

Once you have chosen the way that you wish to split your groups, click Continue and the new groups will be created. They will be named "OriginalName_1", "OriginalName_2" and so on.

Once split, there is no connection between the parent and child groups, so you can work with any of them as you would normally work with your groups without any effect on the others.

I look forward to your comments on what type of experiments you have run with your marketing using this capability.

Wednesday, January 28, 2009

Using Voice to Drive Event Attendance


We've all experienced a similar challenge if we've used webinars, seminars, or other events in our marketing. We put great effort into promoting the event, and driving registrations, but on the day of, a significant percentage of registrants fail to show up.

There are many reasons for this, and I talked a bit about using calendar files (ics) to simplify the reminder process by allowing registrants to add the event into their calendars here: http://eloqua.blogspot.com/2008/12/using-reminders-to-drive-more.html

Another way to assist in ensuring that the maximum number of registrants attend is to keep the level of interest in the webinar or event high by having the speaker leave a message for registrants reminding them of the upcoming event and giving them a few key points that they can expect to get out of the event.

Nothing is more important in creating a successful event than having content that the participants are interested in, and a compelling keynote speaker or webinar presenter is often the most significant factor. If you have selected a good speaker, the message from them will help your attendance rates.


From the Call On Demand area, select Create Phone Message, and select Recorded Voice as a type. This will walk you through a quick wizard that will let you set up the message. You won't need any specialized recording devices, as your message can be recorded over the phone if you don't have a sound file to upload.


Select the option to make the recording now, and type in your phone number. When you click Start Recording, you will receive a call that will allow you to record you message. Follow the simple instructions on that call, and your voice content is created.


Using the voice content is also simple. You can, from the Call On Demand area, send a voice message in a similar manner to how you would send an email. Or, if you would like to tie the message in as part of a program, you can add it in Program Builder. Add a step of type "Call on Demand: Phone Message" and select your voice recording to have the voice call automatically triggered.

By using Program Builder to automate the voice call, you can have the voice content automatically delivered an hour or two in advance of the webinar, or the day before the event, for maximum effect.

Monday, January 26, 2009

First Things First - New Contacts


Most prospective buyers will not be ready to buy when you first make contact with them. In all likelihood, they will be educating themselves on your market space, perhaps downloading some information, meeting you at a tradeshow, or watching a webinar.


Eventually, they may be a buyer, but the journey to that point from first contact is a long one. It's best to make sure that you are well prepared, and that often means you'll want to set up certain processes to run on each new contact added to your marketing database. Sometimes these will be data standardization processes, sometimes, you'll want to add them to a new contacts nurture marketing program.


It's easy to set that up in Eloqua - you create an automatic feeder into a program that pulls in any new contacts. Whether they are new from web forms, uploads, CRM synchs, the API, or any other source, they will be pulled in to the program. You can then do the data standardization or new contact marketing in that program, and all new contacts will be automatically processed.


To set that up, click "Add members to this step" on the menu for the step you want to add new contacts to. Choose an Automatically Recurring Program Feeder, and create a new Feeder.

In the Program Feeder details page, set up the source as "Contacts in Filter", and we'll use a Contact Filter that identifies contacts created in the last hour.


For the contact filter, again create a new filter, and select the Date Created field. It is a special system field that is automatically stamped with the date and time the contact record was created. Set the criteria to "within the last 1hr" and that's all you need for the filter.


With the feeder in place, you are now automatically adding any newly created contacts to the program, regardless of where they are from.

I look forward to your comments on what processes you've set up for new contacts in your marketing databases.

Thursday, January 22, 2009

Only Sending to my Territory - List Eligibility


As your marketing database grows, and your marketing team grows with it, you'll soon want to manage communication by region or territory, so that your communications are not accidentally sent to unintended recipients.


You can do this with a very powerful capability called "Eligibility Criteria" for your distribution lists. Eligibility Criteria create a "universe" to which your email can be sent, and ensure that it is not sent outside of that universe. For example, if I was a marketer for South-East Asia, I would want any of my lists to have an Eligibility Criteria of "anywhere in South-East Asia". If a contact met that criteria, they could receive my emails, if they did not, they would not receive my emails, even if they were otherwise included in the distribution list.


The components of a Distribution List's Eligibility Criteria will be familiar to you. The most commonly used is a Filter, but you can also use Groups if you would like. To set up the territory we just described, we would use a Filter that defined the territory of South-East Asia - see the blog post on targeting a territory here: http://eloqua.blogspot.com/2008/12/targeting-territory.html.


Now, regardless of how the Include and Exclude criteria are set up, only contacts in South-East Asia will receive this email.


To make this feature more powerful, you can set up defaults for each of your users. In the User Management area, select Distribution List Defaults to set up the Eligibility Criteria that is to be added to each Distribution List created by that user. (this can, of course, be managed in bulk rather than individually for each user, but that will be the subject of a later post).

Monday, January 19, 2009

The Other 5% - Manual Steps in Automated Programs


Automation is a wonderful thing for taking care of many tasks that can be defined by simple rules. However, it doesn't work flawlessly in all cases. There are lots of situations where simple rules just won't do the trick, and you need to get a person involved. A good example of this (there are many examples, but I'll use just one) is in lead routing.

You may have a lead routing program that covers most cases very well, but sometimes there are situations where you want someone in sales operations to make the final call, either because it's a territory in transition, or because your data is not good enough to make the decision clearly. Add in a step that is to be manually executed, and you can have this happen.

Create your program step as you normally would within Eloqua, but tick the box that says "Agent will execute step actions" to make it a manually executed step. You can see at a glance which steps in your program are manually executed because their border will show up with a dotted line.


Build the step the way you normally would, in this case we will use an action of "Manually Assign Ownership", but you can have steps that run data rules, send emails, or update your CRM system run manually if your program logic requires it.


When a step is set to be run manually, the Step Owner will see the list of Step Members in his or her Eloqua Today page (the first page you see when you log in to the application. By clicking on that line, you will see all the members of that step who you are assigned ownership of.

From the screen you are presented with, you can work with the step members as you need to. Multiple members can be selected by checking the boxes next to their names, and member details can be viewed by clicking on the Contact icon next to their name.

The Program Actions menu has a list of options you can use to manage the members of the step, including removing them from the Program, moving them to another step, or executing the action that has been selected.

When you choose to execute the action selected, you will be presented with an options screen that lets you configure in more detail what will take place. In this case, as we are determining ownership, I can either run an Ownership Rule, or set ownership to a specific sales person.

With manual steps in Program Builder, you can allow many marketing campaigns to be automated that you might not otherwise be able to automate. If 95% of the rules can be defined, and you have the data, then automate for those, and use manual steps to handle the 5% of rules that require human intervention.

I look forward to your comments and examples of how you have used manual steps in your Programs.

Thursday, January 15, 2009

Experts in the Field - Astadia


Over the past 2 years we've put a lot of effort into developing our partner community, and as we approach our upcoming internation partner conference (next week - Jan 7-9th), it's a great time to highlight them. Each partner brings unique expertise to the table and some great experiences in marketing that make them valuable partners in your Eloqua journey. However, the thing I really enjoy highlighting is the contributions that each of them make to the community of knowledge around demand generation.

Astadia, a partner we've been working with for some time, has been a great example of this. They freely share their expertise with a long-running series of Tip-of-the-Week pointers that are well thought out and a great read. If you're an Eloqua user and looking to grow your expertise, I highly recommend signing up for their tips.


They are available as an RSS feed here:

http://tips.astadia.com/feeds/EloquaTipoftheWeek/subscribe


Or as a regular weekly email here:


http://tips.astadia.com/forms/EloquaTipsSubscribe


And whether you're an Astadia client or not, they would be glad to have you sign up.


Thanks to the folks at Astadia for putting these tips together. If there are other resources that anyone finds valuable and wants to suggest, please don't hesitate to add them to the comments. We all do better by sharing knowledge.

Monday, January 12, 2009

Analyzing a Blog or a Subsidiary Website


As part of running this blog, I wanted to be able to separate my traffic on this area of the site from the main Eloqua.com web traffic. Separating it lets me dashboard it, build rules specific to the site and better understand what is happening.


The first step in working with a blog or a subsidiary website (either for a specific campaign, for a product, or for a subsidiary company) is to define a Sub Site. This is a domain name, or a few domain names, that define the Sub Site to be analyzed. It is still part of the main web analytics, but can also be analyzed as a stand alone entity.


In Eloqua, in the Web Integration tab under Web Profiling, create a new Sub Site, and add in the domain you want to track separately. I'm creating a Sub Site for the Digital Body Language blog, and another for the Eloqua Artisan blog, so I'll create a new Sub Site for each.


That is all you need to do to create a Sub Site. Now it can be analyzed, and added to a dashboard. In the Report Console, go to the Website Overview section and you'll see a list of reports that relate to analyzing your Sub Site.


For each report that you want to use, click the Add to a Dashboard menu item to add it to your dashboard. This will give you a configuration screen where you can configure the options for how this report is shown on your dashboard. I usually would use a relative time range of last 14 or 28 days to give a recent history of the performance of the Sub Site.


Select the dashboard you want to add the report to (I'm assuming you've created a personal dashboard earlier - if not you'll want to do that). The dashboard will be available from your Eloqua Today page, and can be shared with your colleagues if appropriate.


If you're using this technique to track traffic on a blog, you'll probably notice that I didn't cover adding the tracking scripts to the blog itself. Not hard to do on any of the standard blogging platforms, but I'll cover that in a separate post.

Wednesday, January 7, 2009

Quick tip - uploading users


Getting things done in software can take on an interesting pattern - I know I'm guilty of it - where once we figure out one way to do something, if it gets the job done, we continue with it, without necessarily looking for a better way. So, in that spirit, here's a tip that most of you might know, but if I can make things a touch easier for a couple of you, all the better.


If you're working with large numbers of sales users (or even a medium number - anything more than 10 or 20), you have to create, manage and maintain their user accounts in Eloqua. For things like Signature Rules, which are great for maintaining your sales people's personal relationships, you need quite a bit of information in the sales user profile. Maintaining this manually can be quite a bit of work. If you haven't discovered it, there's a better way (and I'm writing this tip because I was just chatting with a user who didn't know of this...).


In the User Management area, choose Upload/Update Users from the top menu. This gives you a familiar upload wizard, very similar to what you are used to for uploading Contacts or Companies, but this one will upload user information to either create or update your user accounts.


There's quite a bit of information that you can manage on each user, so download a copy of the standard user upload template CSV file to give you a good starting point. This gives you a CSV (Excel) file with the right headers to work with to manage any of the relevant fields on the user record. You can work with your own if you want, you'll just have to map the fields in in the wizard.


Fill out the CSV file in Excel with the details of the users you are looking to create or update, and then upload that file in the wizard. You're presented with a mapping screen, but if you used the standard template file, just click Automap Fields, and it will be mapped for you instantly.


Follow the wizard to the end, and click Ok, and you will have uploaded your users into Eloqua with their account information fully set up. You can even set up their appropriate security role membership, password change settings, and CRM user IDs.


Comments welcome as always - I would enjoy hearing whether this level of quick tip is useful, or whether you are interested in more advanced topics on this blog.


Monday, January 5, 2009

A personal relationship - emails from your sales reps


Email is an interesting medium. It's not good at all for starting a relationship, but it is great for continuing and growing a relationship. Think about this from the point of view of a recipient - you likely react very badly to emails from anyone you don't recognize, but don't mind as much if the email is from someone you are in a working relationship with as long as the content is high quality and pertinent.


In B2B marketing, this is even more important, as it has long been known that people buy from people they like and trust, so developing and growing a personal relationship with potential future prospects is key.


That leave us with a challenge, as marketers, how can we communicate efficiently, but still maintain and grow that relationship. One way that has worked very well (up to 30% higher clickthroughs in many Eloqua clients) is using Signature Rules that have an email coming from a salesperson and inserting personal content in the email according to the salesperson assigned to each recipient.


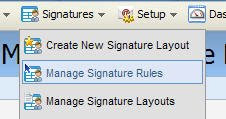
In the email area, click on Manage Signature Rules, and create a new Rule. Signature rules have 3 parts:


  1. the Contact Field we're looking at to determine ownership

  2. the mapping of the values in that Field to appropriate salespeople

  3. the layout of the content (and content itself) to insert for each salesperson on the outgoing email.

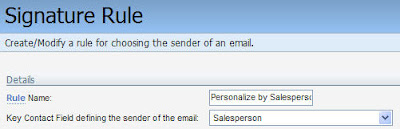
In creating the new Rule, pick the field you want to personalize based on - "Salesperson" is often a good one, but geography (state, country), or industry field can also be used. Click "Autofill Values" at the bottom of the screen to pre-populate the values of the mapping section with the most common values in that field, and map each of them to a User account (the appropriate salesperson).


Note that data quality here matters a LOT. If you have bad data, you will have far too many values to map (see comments on data quality here: http://digitalbodylanguage.blogspot.com/2008/12/contact-washing-machine.html)


That then maps each email recipient to the right salesperson, but we still need to manage what content is dropped into the outgoing email when the email is sent on behalf of that salesperson. Click on Edit User, and at the bottom of the page, you'll see a section of Signature Fields. This gives you all the content on that salesperson that you can automatically insert (note, you can upload users if you have a lot, that's much more efficient if you have 100s of salespeople).


The only remaining step is to define how that content will be inserted into the outgoing emails. Again from the top menu, choose Manage Signature Layouts, and create (or edit) a layout. This lets you define a block of HTML (or text) to insert with the fields from each salesperson in it.


Click Insert User Field to drop in each text field, or image, and then edit them in the WYSIWYG editor as you would normal email content. The email address and display name that the email comes from and the reply address for responses will be automatically added, this is just for the personal message content.


You can send your emails using a specific Layout, or can have each salesperson's content managed in their own Layout, as you'd like. Use "Manage Layout Assignments" to map salespeople and Layouts.


With that in place, you're ready to drop the Signature Layout into your email content. You'll see an "Insert Signature Layout" button in the editor's bottom bar, which works like any of the insert tools, and lets you drop your content into the right spot in your email. With this complete, make sure you test it, by clicking "Preview" on the content menu in your email. On the left side, you'll see a "Select Sender" option, and you can flip through the sender options to see how your email would look coming from each one, including their contact information, picture, and personal message.


Here's mine, obviously I could have worked on my HTML a little bit more in the Layout Editor, but you get the idea.


Looking forward to your comments, and hearing about how you've been using Signature Rules in your marketing.

Friday, January 2, 2009

Eliminating form spam with a quick Captcha


An annoying thing about most forms that make their way onto the web is that they get discovered by automated spam robots that submit their garbage information, and in doing so, invalidate your numbers, and give you extra cleanup effort in order to ensure that only clean data enters your databases.

Luckily there's a quick and easy way to fix that - you have probably seen it if you've ever commented on a blog or signed up for an account on any free service. It's called a CAPTCHA - an acronym for "Completely Automated Public Turing test to tell Computers and Humans Apart.", and in it's most common form, it uses a randomly generated image of a word or letter sequence that you have to type in in order to allow your form to be submitted.

On many less critical sites, it is also done with a simple human-readable request, and verification of that against the known correct answer. Many blog sites like Marketing Profs Daily Fix(http://www.mpdailyfix.com/) and Six Pixels of Separation (www.twistimage.com/blog) use this technique successfully.

There's a simple and easy way to do this with Eloqua, and while it won't prevent form spam from someone who exerts significant effort on your specific web form, it's quick and easy and will prevent almost all form spam from bots that discover your form by trawling the web.

First, create a text field on your form, called Captcha Field, where you will ask a user to submit a word, or the answer to a question.

Then, from the top menu, add server side validation to the form by choosing "Edit Server Validation". We will be verifying that the submitted answer to the Captcha question matches the correct answer, and this should only be the case if it is a human, not a spam bot, submitting the form.

We'll use server side validation (after the form is submitted) as most spam bots will bypass any of the javascript client side validation that one can use (before the form is submitted).

Add a new validation rule on the Captcha field, and make that validation rule of the "Field Value in Data Set" type. This will verify that the value submitted is part of a set of acceptable values, although in our case, the "set" of values is likely to only contain one value. However, if you think that the human-readable question might have more than one possible way of phrasing the answer, you might want to add both (ie, if you ask "what is 2 + 2", you might want to add "four" and "4" as possible answers.

The validation parameters have an option for setting the value to a correct value if it is not correct, but we will not enable that as that would correct the spam bot's answers and allow them through, defeating the purpose.

Create a new Data Set called Captcha Values, and in that set, add in your accepted answers. In our case, if we have the instruction on the form say "type in the word 'notaspammer'", we would add "notaspammer" to our correct value list. You can use words, answers to simple questions or very simple (2 + 2) math questions. Remember that you're only able to stump automated form trawlers, not dedicated efforts with this technique, so keep it simple.

Add the field to your form layout, and instead of the normal field name, type in your Captch question. Next, configure a message that alerts them that the field was not correctly filled out in the case of an error, and you will have a basic Captcha for your form.

I look forward to your comments on this technique, what has worked, what hasn't, and what percentage of spam bots you have found this to resolve.