 Vince Lockyer, Demand Generation Specialist at Avid was kind enough to send in this excellent (and very detailed) example of using blind form submits to customize a newsletter to the exact preferences of each recipient.
The Avid Spotlight newsletter has a subscriber base of well over a million contacts – from bedroom DJs and home video editing enthusiasts through to network TV news engineers, Top 10 music producers and Hollywood feature film editors.
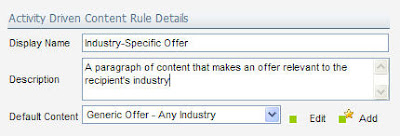
To ensure our broad range of subscribers get the most relevant content, ADC (Activity Driven Content) is used to pull in sections of news and promotional content targeted towards six different segments.
In this post I’ll show how we used ADC and Email Blind Form Submits to dynamically customize the newsletter. Using this method our subscribers can personalize their newsletter with additional content preferences, and then immediately view the updated email in a web browser.
In the first month over 4000 individual customizations occurred using this method. Not only does it help to ensure people get the news they want, but it means our subscribers can provide us with explicit segmentation data about themselves.
How it works
Avid Spotlight content preferences are stored as a series of six contact fields containing an ‘on’ (form checkbox) value indicating whether the subscriber should be receiving that content. If an ‘on’ value is present for a particular content preference then that content gets pulled into the final email using ADC criteria rules.

 An additional set of ADC rules check to see which content preferences the subscriber doesn’t have – displaying blind form submission buttons (right) that automatically add values to the respective content preferences fields.
After the form submission, a confirmation page is displayed automatically redirecting the subscriber to the Web Preview version of the newsletter containing the updated content (below).

Try it Yourself!
http://forms.avid.com/forms/spotlightdemo
Use this form to subscribe to our newsletter (you can remove yourself at any time). You’ll immediately receive the latest newsletter to try out the customization.
The Form
To keep the blind form submission URLs as short as possible, the HTML name of the form is simply called ‘sl’. The form fields are:
• em (Email Address)
• pref (Preference) – Containing the additional content preference code
• sguid (elqEmailSaveGUID) – Used to display the Web Preview
• elq (RecepientID) – Also used to display the Web Preview
The Blind Form Submission
Here is the format of the blind form anchors, using Eloqua dynamic email fields to pull in the email address and Web Preview fields:

Processing Steps
When a blind form submission is received, Eloqua does the following:
• Updates the Contact Field with the relevant content preference (‘on’ value)
• Updates an additional contact field containing the full name (text string) of the content preference (this is used in the confirmation page).
• Updates two more contact fields – RecepientID and elqSaveEmailGUID (also used by the confirmation page).
• Redirects to the Confirmation Page.
After the processing steps, the contact table will look something like this:

The Confirmation Page
This is where the additional content preference is confirmed to the subscriber in a Web Page, followed by a meta redirect to the saved Web Preview version of the email. In order for this last part to work, Contact Table field values have to be pulled into the confirmation page.

Firstly, the page pulls in the name of the content preference and the email address. In our case CEF100441 equals the content preference name field, and C_EmailAddress is the subscriber's email address:

The final part of the confirmation page is the meta redirect, which is in this format:

Where CEF100440 is the elqEmailSaveGUID, and CEF100442 is the RecipientID.
Note: these field names will be different in your instance of Eloqua, and you’ll need to use the ‘Insert Field’ menu item in the Confirmation Page builder to insert the HTML containing the field name.


