It's easy to do - but, like everything... dependent on the data you have in your database, if that's a mess, you will have a tough time building personalization rules based on it.
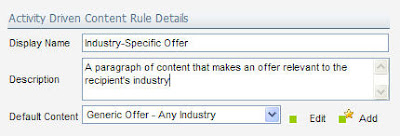
 In the email editor in Eloqua, click on the "Insert ADC" button at the bottom of the editor when you have your cursor in the spot you want to insert the content chunk. Create a rule to define the chunk of content to be inserted - and create a default for what is inserted if no rules are met.
The way these rules work is simple - it evaluates, top to bottom, a list of "rules" and then puts in the chunk of content defined by the first rule that matches. You just build a sequence of rules/content and drop that in the email.

Click on "Add Criterion" to add each section. For each rule section, you can add text, HTML, images, anything that you would normally add into an email.
The rule looks at the data in the Contact Field, compares it to a value that you set and chooses
 content based on that (ie, look at the "Industry" field for "Manufacturing" and if that rule is met, show the "Manufacturing offer" content.
Once you have created all the industry content/criteria you need, you can see the full set in the main rule interface. Make sure you test this with the Preview option from the top menu as it will allow you to scroll through the various options and ensure
 that the content renders correctly with each one.
Once that is complete, you are ready to send your email. Personalized content, done well, has a significantly increased response rate in most situations so don't hesitate to try this out in your next communication with your audience.


0 comments:
Post a Comment